Step by step best methods to paint ATV plastic body and fenders
Painting your ATV is easy to customize and makes it stand out. Painting your ATV’s plastic body and fenders can be a bit more challenging than painting metal, but there are still some tips that can help you do the job right.
When painting plastic, remember that it is not as durable as metal. You need to take extra care not to scratch or dent the paint while working on the project.
Paint your ATV’s plastic body and fenders with these step-by-step methods for the best results!
1. Remove Dirt And Grime By Cleaning The Plastic And Parts
Cleaning the ATV’s plastic body and fenders is a critical step in painting. Removing dirt, grime, and anything else from the surface of your ATV will ensure that paint adheres to the plastic body and fenders as well as possible.
2. Sand Down Or Sandblast?
Preparing a vehicle for paint takes time and energy. Your quad’s rough and sharp edges must be smoothed out before it can be painted.
This process is called sanding, and there are two methods: wet sanding and dry sanding. Wet sanding is done with a lubricant and creates less dust than dry sanding.
3. Remove All Contaminants From The ATV Plastic
There are a few different ways to remove these contaminants from the plastic. The first way is by washing it with soap and water or detergent and water.
The second way is by using a solvent such as acetone or alcohol to dissolve the contaminants in the plastic material.
The third way is by using a chemical cleaner that contains a surfactant, which helps remove dirt, oil, and grease from the surface of the plastic material.
4. Apply The Adhesive
Keywords: ATV plastics, resin sticks to problem plastic, prevents plastic peeling. This prevents chips and cracks from forming in the future and keeps your paint job durable. The adhesive is designed to be a permanent solution to the problem of plastic peeling.
It is made of resin and sticks to the plastic problem, preventing it from peeling, chipping, or cracking.
It Instantly contains the scrapping and peeling that plastic is notorious for. There’s no need to worry about getting damaged or rusting your paint job.
It works on any nonporous surface, so it’s an excellent option for plastic bodies.
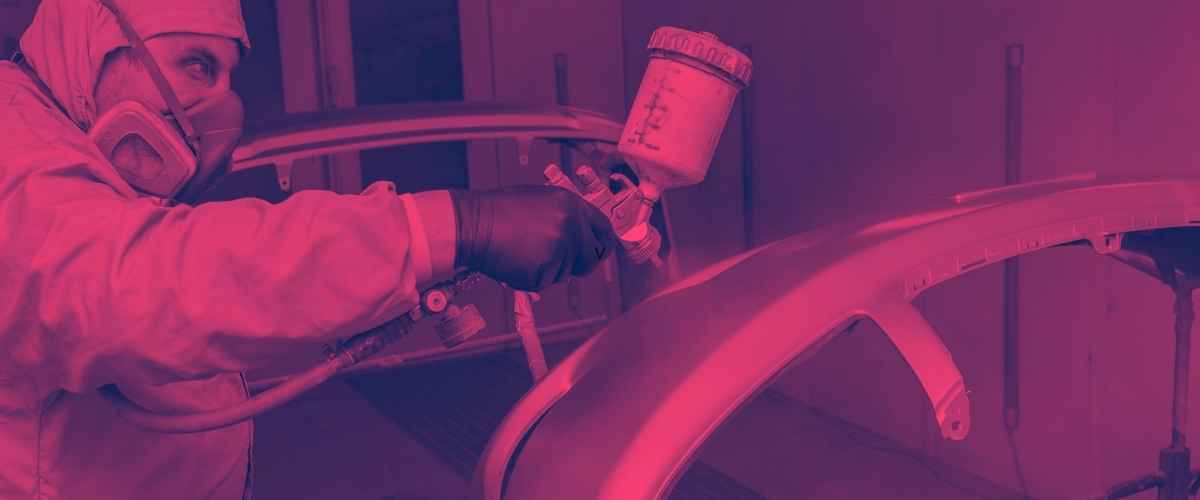
5. Apply A Good Quality Primer
Primers are a type of paint applied before painting to fill in any scratches left by the sanding or sandblasting steps.
They are also used to fill any existing scratches on your surface. Primers come in various colors, so you can match them to your desired paint color and make sure that the primer is even with the surface of your ATV.
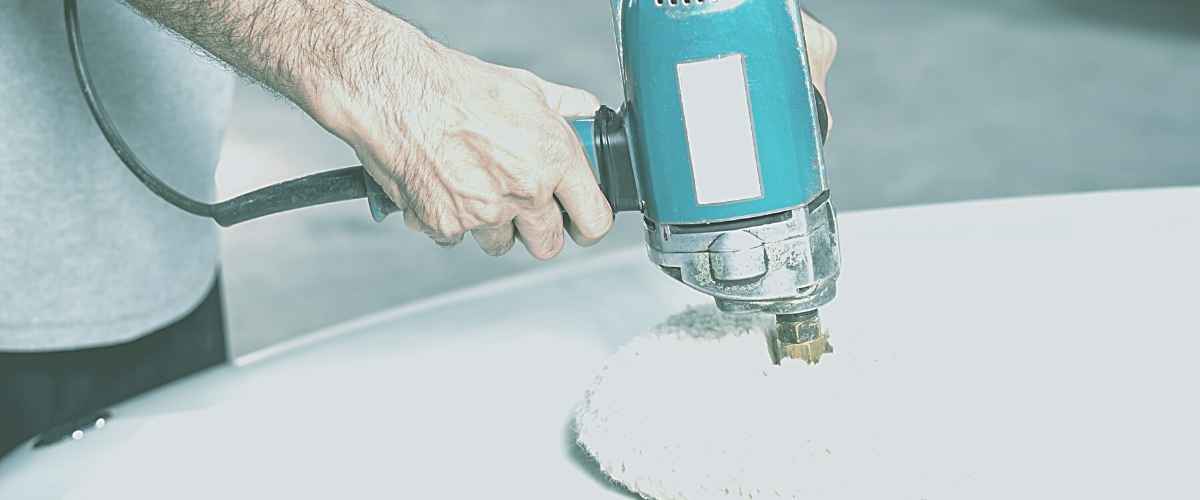
6. Sand The Plastic
keywords: sand ATV plastic, sand with high grit sandpaper, sand to remove primer coating
Sand to remove primer coating from the plastic. The primer coating can be removed by using high grit sandpaper on the ATV plastic.
To remove the primer coating, sand the plastic with light pressure in a circular pattern.
7. Use The Best ATV Sealer
ATV sealer is a liquid sprayed on the paint to keep it from cracking and peeling.
This sealant protects the life of paint, suitable for extreme heat and cold conditions. ATV sealers are available in different types and brands, but it’s crucial to find one that suits your needs.
The best ATV sealer will have UV protection and be water-resistant
ATV base coats are different from other paints because they have higher polymers, providing protection and durability to vehicles.
Flex additive helps ATV paint move better over rough surfaces without being too thick or thin.
How to Paint Your ATV in Camo the Easy Way
You can do it quickly if you want to paint your ATV in camo.
The first thing you need to do is make sure that your ATV is clean and dry. You also need to have good quality camo paint, tape, masking paper, and an airbrush or spray gun. Once the vehicle is dry, you can start painting.
Painting camo patterns on ATV plastics can be a tedious job.
The most uncomplicated process usually involves masking off the area with painter’s tape, then painting the pattern, and finally removing the tape to reveal a clean camo pattern.
With this technique, you can paint camouflage patterns on your ATV plastics in just minutes! All you need is some painter’s tape and regular paint.
This technique will save you hours of time and frustration. It also makes it easy to create awesome-looking camo patterns perfect for hunting season or other occasions.
Why Should You Paint Your ATV With Camo Paint?
For hunters, camo patterns are a must-have. The practices help disguise the hunter and protect them from being detected by the prey.
Camo paint is also vital for those who want to go hunting with their ATVs. It helps to keep you safe and undetected as you drive your ATV through the forest.
Camo paint can be purchased in many different colors, so it’s easy to find one that matches your preferences.
You can even buy a kit that includes two gallons of spray paint and two gallons of primer for less than $100.
How to Wrap an ATV Plastic
What are the Benefits of Wrapping ATV Plastics?
Some people think that wrapping an ATV in plastic is a waste of time, but this is not true. If you want to keep your vehicle’s plastic in the best possible condition, it is essential to wrap it.
Wrapping an ATV plastic will protect against scratches and other damages caused by dirt and dust.
The benefits of wrapping an ATV in plastic are numerous. For example, it will make your ride look better, and it will also protect the vehicle from any unwanted damage.
Methods & Tools for How to Wrap an ATV Plastic
The first and most important thing is to find out what type of material you have.
If it’s a vinyl sheet, you need to use a heat gun or hair dryer to warm up the vinyl wrapped around the ATV plastic. You will need the following tools:
- Wrap Gloves
- Squeegee
- knifeless tape
- Precision knife
- isopropyl alcohol
- heat gun
Step 1 – Clean Surface Before Applying Adhesive
The first step is to clean the surface with alcohol before applying adhesive. Doing this will make it easier for the adhesive to stick to your surfaces, and no residue will be left behind.
Step 2 – Make Sure There Is Adhesive Side Up And Apply It Carefully On The Surface
The adhesive should be applied to the base plate and not the wrap. The wrap will stick to the base plate instead of coming off.
Step 3 – Put The Plastic On The Base Plate
Cut out larger pieces so that they fit nicely. Remember not to have the pieces touching or overlapping, as this will make it hard to remove them once you are done.
How Much Does It Cost To Vinyl Wrap An ATV?
The cost of vinyl wrapping a vehicle can vary depending on the size and type of vehicle, but typically, it is about $2 per square foot.
It’s not that difficult to find a cheap vinyl wrap kit for an ATV. But is it worth the price?
A low-price vinyl wrap kit is cheaper than a high-quality one, but it will also produce poorer quality results.
The more affordable kits are made of thin material, resulting in bubbles and wrinkles, and the adhesive may not be as strong.
It would be best to consider these factors when looking for a cheap vinyl wrap kit.
The Different Types of Films Used in a Vehicle Wrap
There is no one best type of vinyl wrap; they all have strengths and weaknesses.
The most popular vinyl wraps are Clear Films, Flame-Retardant Films, Matte Films, Metallic Films, Satin Films, and Solar Control Films.
How Long Does It Take To Vinyl Wrap An ATV
The average time for vinyl wrap installation on an ATV is 3 hours, but it can vary depending on how complex the design is and how much detail there is.
Many factors will affect how long it takes for your car to be wrapped in vinyl, including:
-Size and complexity of the vehicle
-Number of colors used for graphics design
What Is Hydro Dipping
Hydro dipping is when a substrate is dipped in a liquid coating. The coating can be anything from paint to wax, and the process will result in an object with a durable, sealed exterior.
Hydro dipping is essentially the process of dipping an object into a liquid coat of paint or other material. The result is that the object will have a durable exterior that can be used for many purposes.
Hydro dipping has been around for some time now and has been used for many different applications.
It’s not just about painting – you can dip objects into wax, vinyl, rubber, or any other coating material to get different effects and durability levels.
This process is also used for ATVs, jet skis, and other vehicles.
Hydro dipping has been around for decades, but it has recently become more popular as companies have been able to find new ways to use the technique for different items.
How Much Does It Cost To Hydro Dip ATV Plastics?
Hydro dipping is a process that adds a custom layer of paint to the plastic surface. The cost for this service will depend on the size and complexity of the design.
The cost for hydro dipping an ATV plastic can range from $600 to $1,000 in total. This includes the price for a custom hydro dipped kit pre-made by a company or custom-made by an artist.
The price will also depend on the size and complexity of the design. For example, if you want your favorite sports team logo painted on your bike, it will be more expensive than having your initials done because it is more complex.
How Long Does Hydro dipping Last For ATVs?
The coating will protect your ATV from environmental hazards such as dirt, water, and salt. A hydro dip can last anywhere from 6 months to 2 years, depending on how often you use your ATV.
Can I Hydro Dip My ATV At Home?
In the interest of safety, we recommend that you not attempt to hydro dip your ATV at home. Hydro dipping is a process that requires a lot of attention to detail, and it is best left to trained professionals.
To hydro dip your ATV, you must completely disassemble it. In addition, you should have a plan for what you will do with all the parts afterward.
The final product should be thoroughly rinsed and dried before reassembling it.